 Australian Dollars
Review: Connect SmartHome 10W White Downlights
Review: Connect SmartHome 10W White Downlights
By Jason Murray

Having just moved into a new apartment, one of my first goals is to try to “smarten up” the lights and add voice control to the house with Google Assistant. I had a few light bulbs and light strips around from previous setups, but my new apartment presented a problem I hadn’t faced before: it’s full of downlights, 22 of them in fact. My bulbs are nearly useless.
The new apartment has cool white lights with a nice 850 lumens brightness. I had no problem with the brightness of the lights, but while I didn’t mind the cool white it did make the apartment feel a bit cold and clinical. I wanted to be able to switch them to a warm white to make the living areas of the house more appealing, especially during the cooler winter months.
Downlights can be some of the most expensive types of smart lights (typically your options are $60+ each), so kitting out a house with so many bulbs becomes a pretty expensive operation.
Enter Connect SmartHome, a new smart device brand from Australian company Laser, sold exclusively at Harvey Norman (including Domayne and Joyce Mayne, depending on where you live). The lighting range is pretty extensive, from standard bulbs to light strips with a stop by some “Festoon” lights along the way. The prices are extremely competitive, with standard smart bulbs starting at just $10 each.
The big appeal for me is the $29 10W smart white downlight (CSH-240WW10W) that offers a variable cool/warm white temperature (anywhere from 2700K to 6500K). The brightness of 1000 lumens was especially welcome, and it halves the price of kitting out my house with smart lights.
Laser kindly supplied six of these lights to cover the living room for review purposes.

If you need a little colour in your roof, you can get an RGB version of the same light (CSH-240RGB10W) for $49. However, I prefer my ceiling lights to remain white and use lamps and light strips for colour accents.
These lights are 2.4Ghz devices, which is a little disappointing for new smart devices launching in 2020, but my Google Wi-Fi network runs both 5Ghz and 2.4Ghz so I didn’t expect to have any troubles in this regard.
Does this downlight fit your house?
As downlights have become popular over the years, a number of different standards have emerged. Before you jump into purchasing lights, especially downlights, you need to ensure you know which lights you’re replacing and how you’re going to go about it.
A lot of houses built (or renovations performed) over the last 15-20 years could be using GU10 bulbs. Those are on offer in the Connect SmartHome range, but they’re not the type that fit my house.
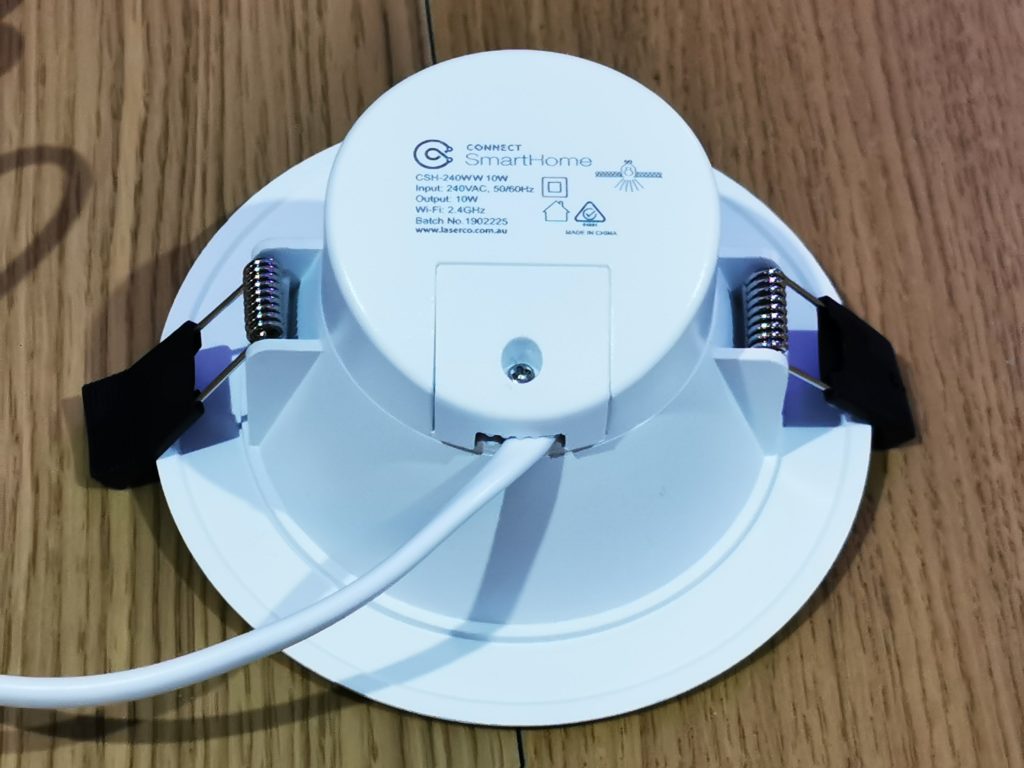
Over the years, downlights have evolved and installation methods have changed. Most downlights are now self-contained units with LED lights behind a diffuser (so there’s no GU-10 bulb to change). They fit within a cutout hole in your ceiling, held in place by springs. Originally, these lights would connect to a driver, which then connected to power – this required some pretty extensive wiring work in your ceiling. These days, they connect to standard power sockets and installation is much simpler.
Fortunately for me, the new apartment fits the latter, more modern configuration. I confirmed this by pulling one of the lights to check the wiring (after turning it off, of course).

The Connect SmartHome downlights are designed to fit within a 90mm hole in your ceiling. It requires about 60mm clearance (unlikely to be a problem given the space in your roof cavity) and has a 1m power cord with a standard Australian power plug at the end of it.
That’s it – there’s no need to connect to drivers. Plug and (mostly) play.
")

Setup and Installation
BEFORE YOU BEGIN: A really important note: you should consult a qualified electrician if you’re not confident working with the wiring within your house, or if you’re unfamiliar with it. Working with electricity can literally be a case of life and death, and you should take appropriate precautions. I had an electrician come in for the initial install of the lights, and he found that the power socket near one of my lights was incorrectly installed and could be unsafe.
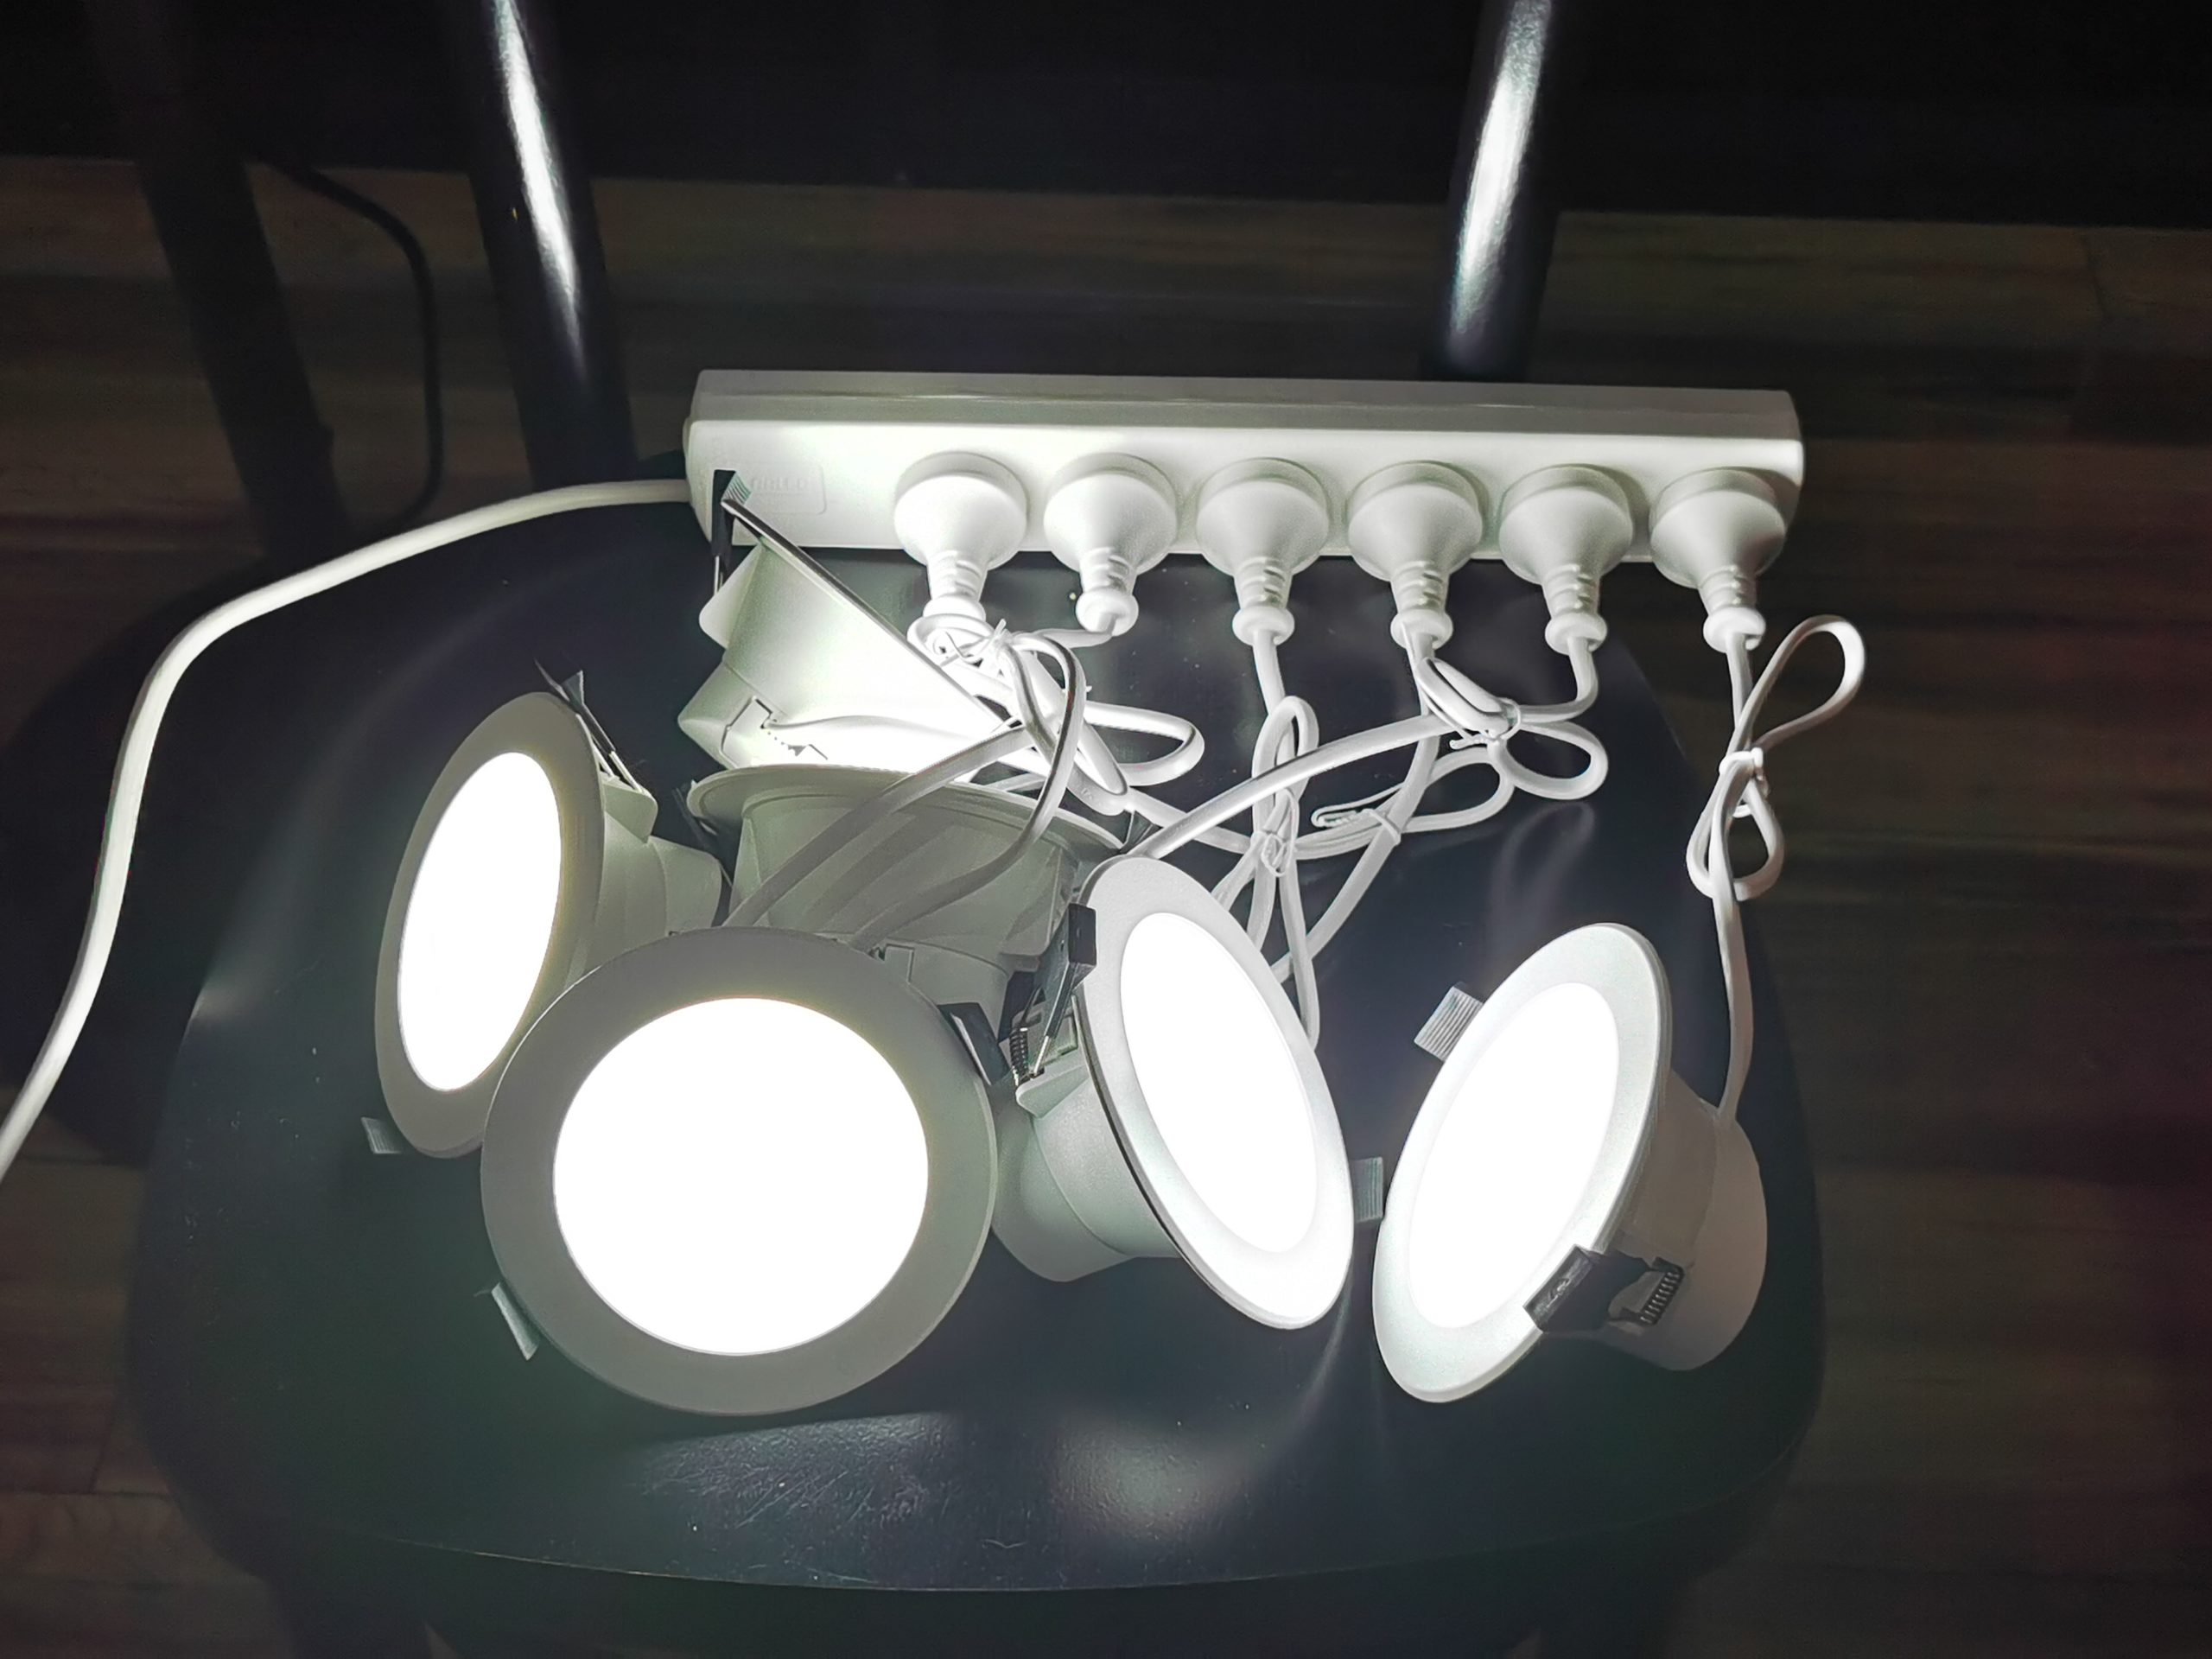
Before getting the electrician in to install the lights in the roof, I wanted to make sure all the lights worked and could be paired up and controlled with the app, so I got out a power board and connected the lights up one by one.
The Connect SmartHome app is pretty much the same as a bunch of other apps out there running a common Tuya platform. This is pretty typical for this end of the smart device market – the app is serviceable but not terribly intuitive. The instructions seem like they’ve been translated into English but could have been better-written (“enable to turn off”), and there’s a couple of ways to configure lights.
The lights should be ready to pair out of the box, but some of the units supplied for review weren’t – maybe they’d been tested in the factory